With Peter Pan collared garments still in trend, we decided to document the exact steps we took to make this gorgeous green Peter Pan collar puff sleeve blouse made with our 100% cotton lawn fabric.
In our tutorial, we’ll show you the materials we used, the prep work we did as well as the cutting of the fabrics, and then how we pieced all parts of this blouse together to make it into the finished product. Follow along with our step-by-step guide below!


Before Sewing the Peter Pan Collar Puff Sleeve Blouse
Materials Needed
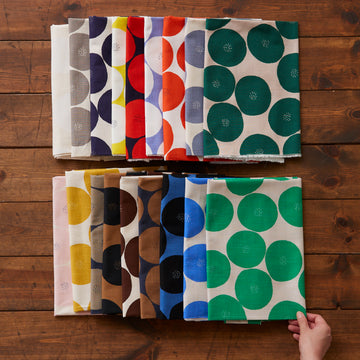
Fabric Used: Flownny Ditsy Cotton Lawn - KOKKA Original Design in color C (Green)
This fabric has just the right weight for making gathers and ruffles. Its medium weight makes it easy to create gathers.
The measurements below are enough to make a size small blouse.
- Front bodice (2 pieces): 24.5 in x 28in (w)
- Back bodice (1 piece): 26 in x 23in (w)
- Facing front bodice (2 pieces): 28.5in x 11in (w)
- Facing back bodice (1 piece): 5in x 14in (w)
- Sleeves (2 pieces): 14.5in x 23 in (w) per piece
- Oversized collar (2 pieces): 20in x 13.5in (w) per piece
- Ruffles for collar: 1 ¼ in x 44.5in
Total fabric used: 2.3 yards
Other materials:
- Interfacing (non-fusible lightweight): 31in x 14in (w)
- ½ inch elastic band: Length depends on size of arm width
- ½ inch buttons x 5
- Safety pin
Pattern Pieces
Click on the pattern diagrams to enlarge


Pre-washing Fabric
Always pre-wash any fabric before proceeding with layout and cutting. In this particular project, there was a shrinkage of 1”.
You can learn more about pre-washing fabric by reading our guide about pre-washing here.
Pattern Layout and Cutting
When doing layout of patterns on printed fabric, always double check that the print matches the front and back bodice. In this project, both the front and back bodice are facing the same direction to ensure the floral pattern is going one direction.
Peter Pan Collar Puff Sleeve Blouse Sewing instructions
1. Attach non-fusible lightweight interfacing to the facing fabrics. When attaching non-fusible interfacing, baste the interfacing to the fabric. The basting thread is 1/8 inch below the sewing line.


2. Finish the raw edges of cut fabric.
3. Sew together front and back facing.

4. Sew together front and back bodice.

Assembling the Collar
5. For the collar, there are three pieces to be assembled – front and back collar pieces, and the strip of gathered fabric for the ruffles. In the photo below, we used non-fusible interfacing and basted the interfacing to the fabric.

The fabric strip for the ruffles is 1 ¼ inch (width) x twice the outside measurement of the collar (length.)
6. To create the gathered strip of fabric, cut a single strip of fabric with a length of 90 inches and a width of 1 ¼ inch. You may adjust the width of the ruffles according to your preference. For this project, we’ll be working with ½ inch ruffles. Finish one side of the fabric.

7. Sew a stitch line ½ inch away from the edge of the fabric. Use the longest stitch length in your machine for this stitch line. Sew another stitch line ¼ inch away from the first stitch line. When creating these stitch lines to gather the fabric, leave a longer thread at the start.

8. Pull on the thread to gather the fabric.

9. Attach the right side of the gathered fabric to the right side of a collar piece. Baste the gathered fabric to the collar piece for the ruffles to stay in place when sewing.
10. Attach the right side of the other collar piece to the wrong side of the gathered fabric. The goal is to sandwich the gathered fabric in between the two collar pieces. When the collar pieces are flipped, the ruffles are visible to see.

11. Sew an understitch at the bottom of the collar. Join the bottom collar and seam allowances together. Sew understitch 1/8 inch away from the seam allowance. The understitch will not pass through the front collar piece.

12. Attach collar to the bodice. When pinning, pin first to the centerback and shoulders. Baste in prepation for sewing bodice and collar together.


13. Baste together sides of sleeves. Do not sew until the end. Put the measured elastic band at the edge of sleeve hem and sew until the part where the band is.

Attaching the Puff Sleeves
14. Fold two inches of fabric inward. We will be creating a “tunnel” where the elastic band will be inserted.


15. Adjust stitch length to the longest length. Topstitch the sleeve hem to the sleeve fabric. Sew another line ¾ inch from the hemline. Leave half an inch open to make it easier for inserting the elastic band.

16. Attach a safety pin to one end of the elastic band. Insert into the tunnel and pull the fabric until the band comes out on the other end.

17. The fabric will start to gather as you push and pull the elastic band.

18. Sew the ends of the elastic band together. Close the opening as well by sewing along the hemline. Repeat on the other sleeve.


Attaching Sleeves to the Bodice
19. Pin sleeves to the bodice. When pinning puffed sleeves, there will be excess fabric. Pin the excess fabric similar to the photo above. Baste and sew.


20. Pin facing to the top of collar. The collar piece will be sandwiched in between the bodice and facing. Baste and sew from the hem of front bodice across the collar to the other side of the front bodice hem.

21. Sew an understitch beneath the collar. To sew the understitch, have the collar facing faced down and join the facing and collar seam allowance. The understitch will be sewn 1/8 inch away from the seam of collar and facing.

22. Topstitch near the seam joining front bodice and facing.

23. Measure the button placements and sew the button holes. Distance between the buttons is 2.5 inches while the distance from the edge depends on how close you want the ruffles to be. Length of buttonholes is 1/8 inch more than the size of button.

24. Hem bottom of bodice by folding ½ inch and making a topstitch.
We hope you enjoyed this DIY tutorial! We can't wait to see your sewn up Peter Pan collar puff sleeve blouses! When sharing your blouse on social media, please tag your makes #kfpeterpancollarblouse so we can find it.
If you have any questions about this sewing tutorial or need help selecting fabric, please get in touch at our Contact Us page.
Happy making!